Gardening
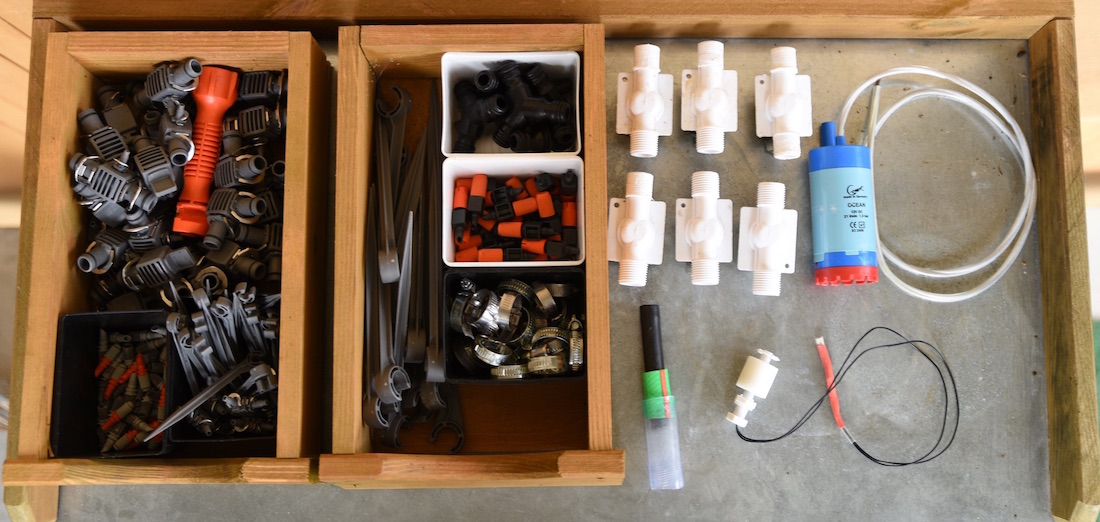
Hardware
- Pump: Comet 1104.92.59 [12V, 1.5 bar, 1260 l/h]
- Valve: Plastic water solenoid from adafruit [6 - 12V, 1/2"]
- Water-level switch: Bought at boxtec.ch [max switching load: 0.5A, 100V]
- Hose, connector and nozzle for irrigation: From Gardena and Migros
 >
>
Power
- Powered by 12V, 10A power supply
- Secured by 5A fuse from maurelma.ch
- Swichted by ETH board
Setup
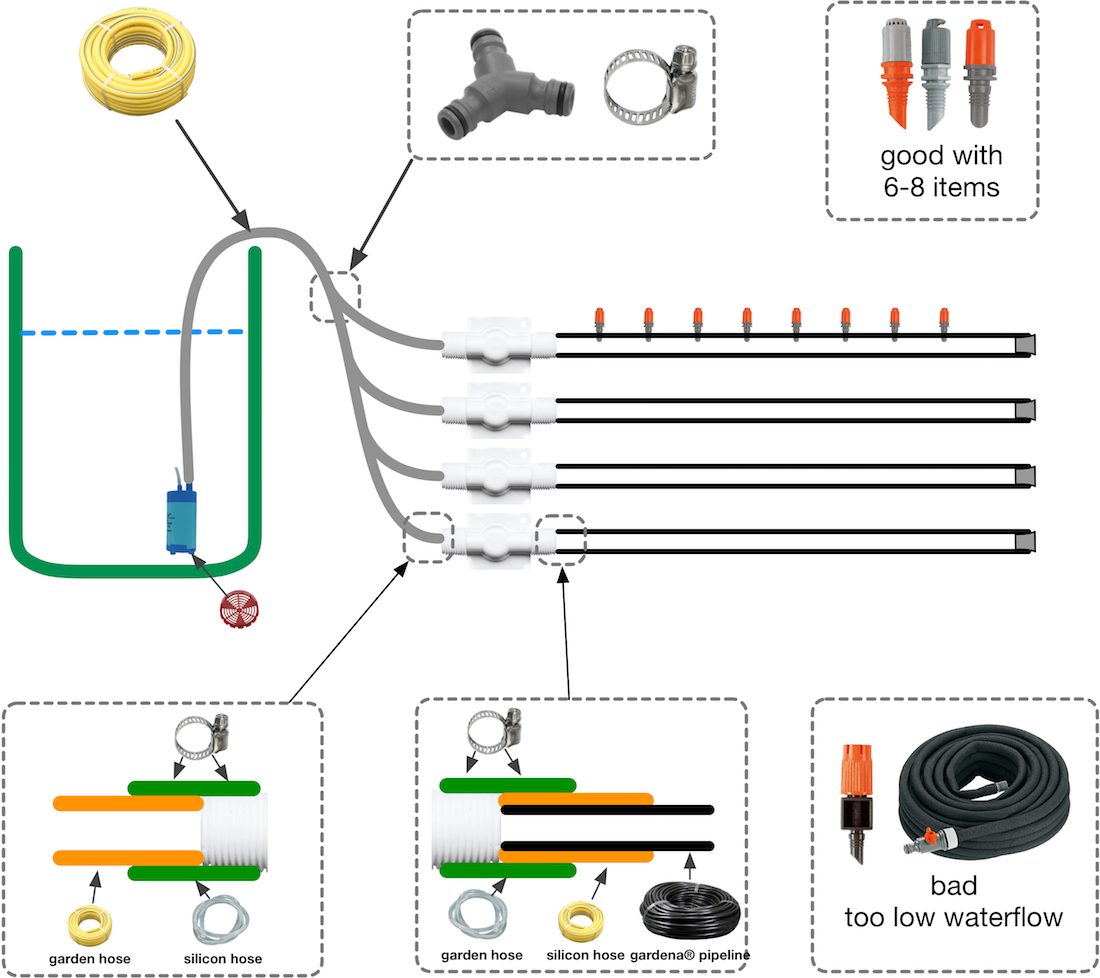
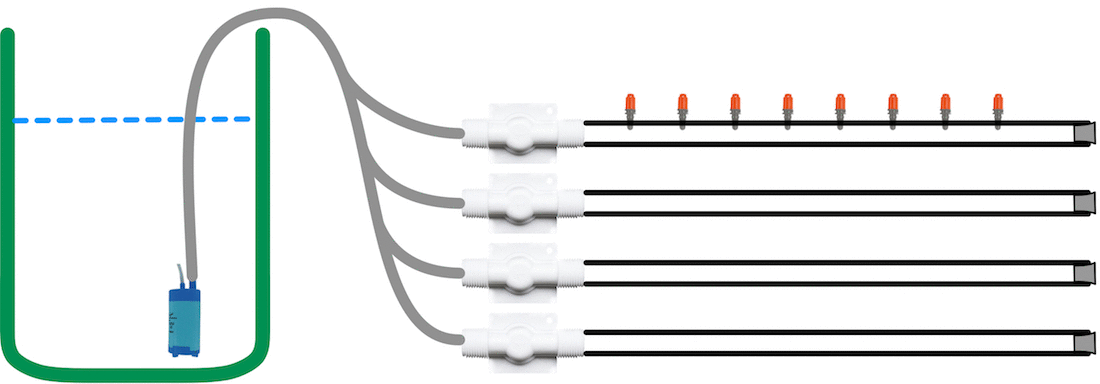
- Water nozzles which just drop are not working
- 6-8 water nozzles used at the same time were working in my case
- Hose clamps and matching hose connectors worked perfectly. Can be easily tested in the DIY store.
Leassons learnd
- First power on the solenoid, then the pump. Otherwise the solenoid will not open! The solenoid requires a compression wave to open.
- Moisture sensors: Inital idea was to use moisture sensors to trigger the watering. But, all tested moisture sensors failed. Therefore, I used a time shedule to trigger the watering.
- Grouping: It makes sense to group the plants connected to the solenoids by their water consumption/requirement.
- Sun exposure: Insead of a photosensor, use a thermometer to measure the total sun exposure. I used the temperature difference between sun and shadow to determine if the pumpkins needs additional water
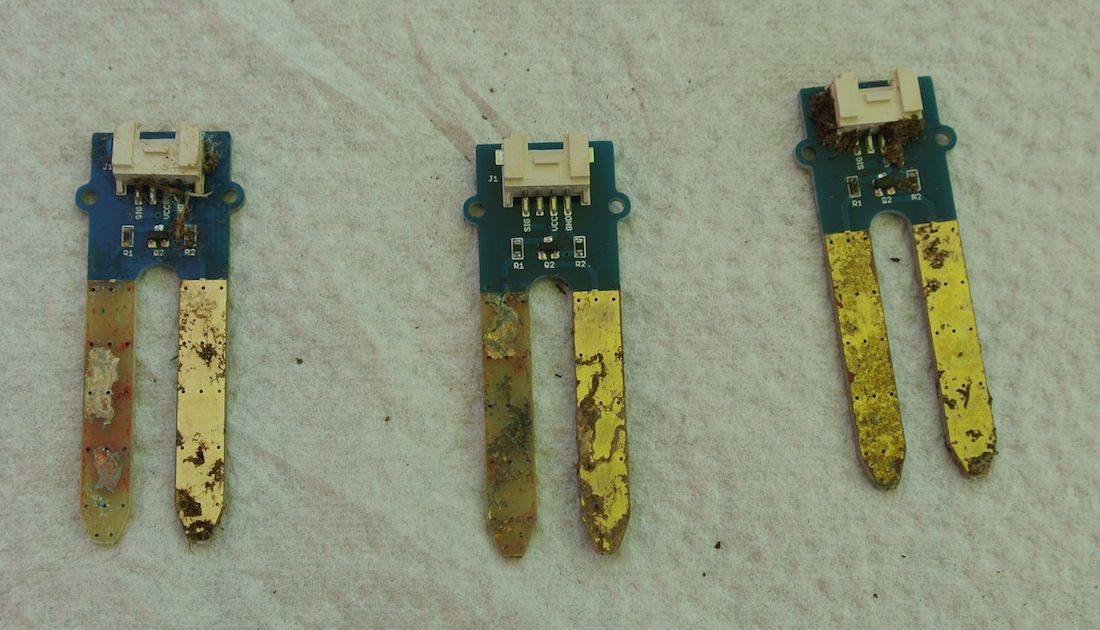
Moisture Sensors
Grove - Moisture Sensor
These sensors loose the copper covering one electrode. Moreover, it provides very imprecise values, which decrease over days due to the copper corrosion on the electrode.
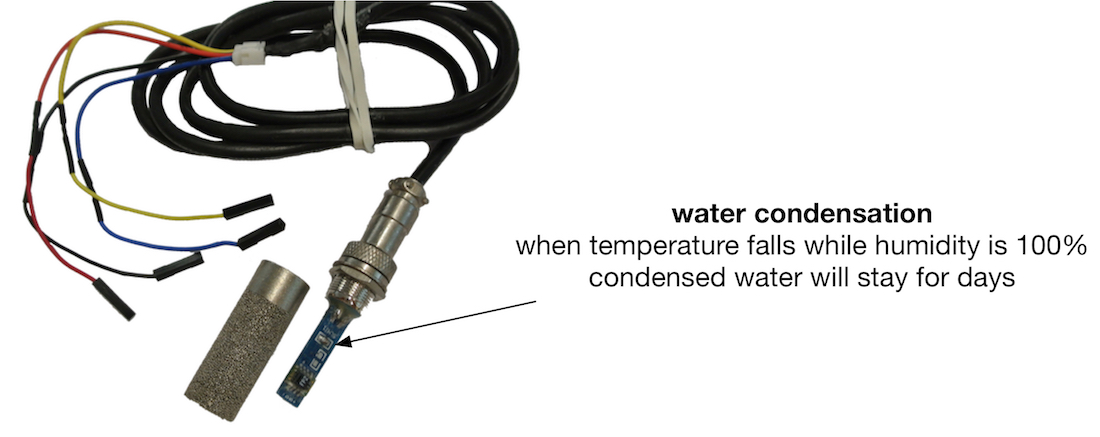
Adafruit - Soil Temperature/Moisture Sensor
This SHT-10 based soil sensor fails when temperature falls while humidity is 100%. Due to the sinter metal mesh encloser, the condensed water stays for days
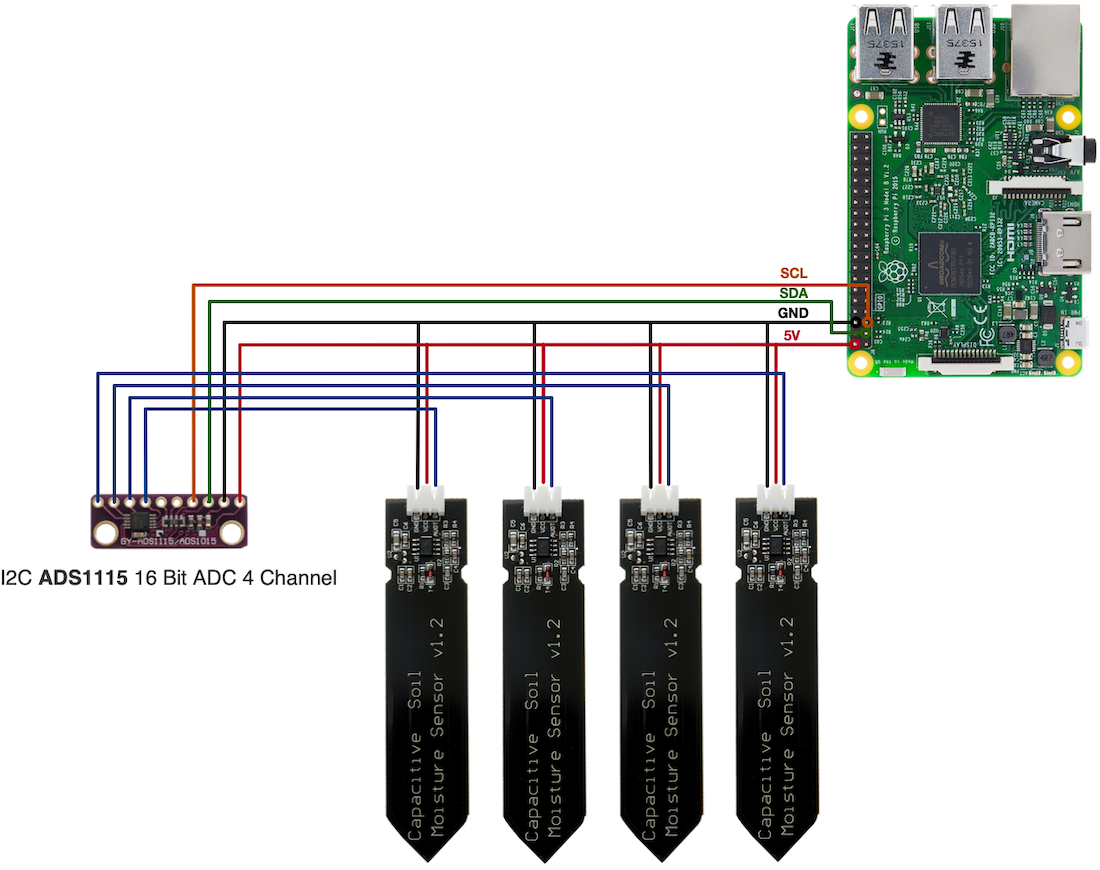
Capacitive Soil Moisture Sensor
- 1 out of 4 was not working
- Thin side of the circuit board can be sealed with epoxy
- Protect circuit on top of the senor from rain
- ADC is required to connect to raspberry pi
Enable I2C
raspi-config
# Interfacing Options -> I2C
reboot
Check I2C
i2cdetect -y 1

     0  1  2  3  4  5  6  7  8  9  a  b  c  d  e  f
00:          -- -- -- -- -- -- -- -- -- -- -- -- --
10: -- -- -- -- -- -- -- -- -- -- -- -- -- -- -- --
20: -- -- -- -- -- -- -- -- -- -- -- -- -- -- -- --
30: -- -- -- -- -- -- -- -- -- -- -- -- -- -- -- --
40: -- -- -- -- -- -- -- -- 48 -- -- -- -- -- -- --
50: -- -- -- -- -- -- -- -- -- -- -- -- -- -- -- --
60: -- -- -- -- -- -- -- -- -
Install lib
apt-get update
apt-get install i2c-tools build-essential python-dev python-smbus python3-dev python3-smbus git python-pip python3-pip

pip3 install adafruit-circuitpython-ads1x15
Example for 3 Sensors
import time
import board
import busio
import adafruit_ads1x15.ads1115 as ADS
from adafruit_ads1x15.analog_in import AnalogIn

# Create the I2C bus
i2c = busio.I2C(board.SCL, board.SDA)

# Create the ADC object using the I2C bus
ads = ADS.ADS1115(i2c)

# Create single-ended input on channel 00
chan0 = AnalogIn(ads, ADS.P0)
chan1 = AnalogIn(ads, ADS.P1)
chan2 = AnalogIn(ads, ADS.P2)

# Create differential input between channel 0 and 1
#chan = AnalogIn(ads, ADS.P0, ADS.P1)


print("{:>5}\t{:>5}\t\t{:>5}\t{:>5}\t\t{:>5}\t{:>5}".format('raw', 'v','raw', 'v','raw', 'v'))

while True:
    print("{:>5}\t{:>5.3f}\t\t{:>5}\t{:>5.3f}\t\t{:>5}\t{:>5.3f}".format(chan0.value, chan0.voltage,
                                                                           chan1.value, chan1.voltage,
                                                                           chan2.value, chan2.voltage))
    time.sleep(0.5)